Discover how to protect your garden and add style with DIY hose guides. These simple, cost-effective solutions keep hoses organized and prevent plant damage, enhancing your outdoor space.
Why DIY Hose Guides Are Essential for Your Garden
DIY hose guides are a practical solution to protect your plants from damage caused by heavy hoses. They keep your garden organized and prevent accidental harm to flowers and vegetables. Easy to install and customize, these guides add a decorative touch while ensuring efficient watering. By safeguarding your garden’s beauty and functionality, DIY hose guides are a simple yet effective essential for every gardener.
Benefits of DIY Hose Guides Over Store-Bought Options
DIY hose guides offer unmatched customization and cost savings. Unlike store-bought options, homemade guides allow you to tailor materials and designs to fit your garden’s unique style. They are often more durable and eco-friendly, using recycled materials like rebar or balusters. Additionally, DIY projects provide a sense of accomplishment and can be completed at a fraction of the cost, making them a practical and rewarding choice for gardeners.
Materials Needed for DIY Hose Guides
Common materials include rebar, plastic orange golf balls, pre-primed balusters, and decorative finials. These components are cost-effective, durable, and add a stylish touch to your garden.
Cost-Effective Materials for Hose Guides
Rebar and plastic orange golf balls are budget-friendly options for DIY hose guides. Rebar offers durability and affordability, while golf balls provide visibility and a decorative touch. Pre-primed balusters and curtain or deck finials are also cost-effective, adding style without breaking the bank. These materials ensure functionality while keeping costs low, making them ideal for gardeners seeking practical yet aesthetically pleasing solutions.
Durable and Weather-Resistant Materials
For long-lasting DIY hose guides, use durable materials like metal stakes or PVC pipes, which withstand outdoor conditions. Weather-resistant finishes, such as rust-proof coatings or waterproof sealants, ensure longevity. These materials are ideal for withstanding rain, sun, and heavy use, providing reliable support for your garden hose while maintaining their integrity over time;
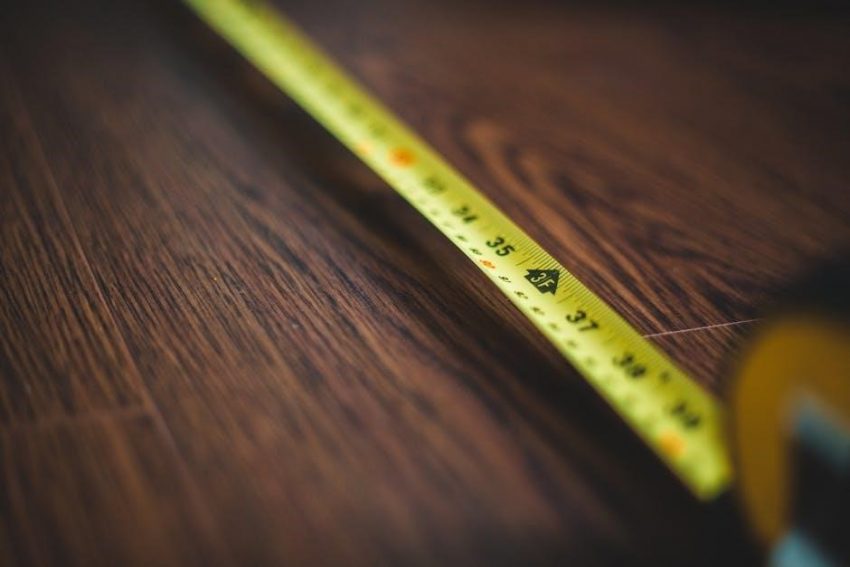
Tools Required for the Project
Essential tools include a drill, saw, measuring tape, and wrench for cutting and assembling materials. These ensure precise and secure construction of your DIY hose guide.
Basic Tools Every DIY Enthusiast Should Have
A drill, saw, and measuring tape are essential for cutting and assembling materials. A wrench and pliers help secure connections, while a hammer and screwdriver assist with adjustments. Sandpaper ensures smooth edges, and a level guarantees straight installations. These tools provide a solid foundation for any DIY project, including hose guides, and are versatile enough for various tasks around the house or garden.
Specialized Tools for Precision and Safety
A pipe cutter or rebar cutter ensures clean, precise cuts for custom lengths. A heat gun can deburr plastic edges for safety. Safety gloves and goggles protect against sharp debris. A laser level helps align guides straight. These tools enhance accuracy, safety, and durability, making your DIY hose guide project more professional and long-lasting while minimizing risks during construction and use.
Step-by-Step Guide to Making DIY Hose Guides
Create functional and stylish hose guides with ease. Use short pieces of rebar and plastic orange golf balls for a durable, decorative solution. A pipe cutter ensures precise cuts, while heat guns smooth rough edges for safety. Follow these simple steps to protect your garden and add a personal touch to your outdoor space.
Preparing the Workspace and Materials
Start by gathering essential materials like rebar, plastic orange golf balls, and a pipe cutter. Ensure your workspace is clean and flat, with tools within easy reach. Lay out materials neatly to avoid clutter. Use a vice to hold items steady during cutting or shaping. Safety is crucial, so wear protective gloves and eyewear. Keep the area clear of debris for efficient workflow and precise cuts. This preparation ensures a smooth and safe project execution.
Assembling the Hose Guide Components
Begin by cutting the rebar into desired lengths using a pipe cutter. Insert one end of each rebar piece into the ground where you want the guide. Slide a plastic orange golf ball onto each rebar, ensuring it sits securely. This creates a visible and durable guide. For added stability, bend the top of the rebar slightly before inserting it into the ground. This assembly method ensures the hose glides smoothly around your garden without damaging plants or the guide itself.
Finishing Touches for Aesthetic Appeal
Add a personal touch to your hose guides by painting the rebar with weather-resistant paint or wrapping it with decorative tape. For a polished look, attach small decorative caps or finials to the tops. Consider adding solar-powered lights around the guides for nighttime visibility. These finishing touches not only enhance the functionality of your DIY hose guides but also complement your garden’s unique style and charm.

Customization Options for Your Hose Guides
Personalize your hose guides with paint, decorative caps, or solar lights. These touches enhance functionality and style, making your garden setup both practical and visually appealing.
Adding Decorative Elements to Your Hose Guides
Elevate your hose guides with decorative touches like colorful paint, solar lights, or unique finials. Use materials such as plastic golf balls or curtain rod finials for a stylish, functional design that complements your garden’s aesthetic while keeping hoses organized and protecting plants. These small details add personality and make your DIY project stand out, creating a beautiful and practical solution for your outdoor space.
Personalizing the Design to Match Your Garden Style
Customize your hose guides to blend seamlessly with your garden’s unique style. Choose materials like pre-primed balusters or finials that match your outdoor decor. Paint or stain them to complement your garden’s color scheme, creating a cohesive look. Whether your style is rustic, modern, or vintage, these personalized touches ensure your hose guides are both functional and visually appealing, enhancing your garden’s overall aesthetic without compromising on practicality.
Installation and Placement Tips
Strategically place hose guides around plants and garden beds to protect them from hose damage. Secure guides firmly in the ground for stability and long-term use.
Strategic Placement for Maximum Efficiency
Position DIY hose guides along the hose path to avoid damaging plants. Place them near vulnerable areas like flower beds and vegetable gardens. Ensure guides are spaced evenly and angled away from sensitive growth. This prevents accidental damage and improves watering efficiency. Consider high-traffic areas and common watering routes to optimize placement. Strategic positioning enhances both functionality and aesthetic appeal, ensuring your garden remains protected and well-maintained.
Securing the Hose Guides for Long-Term Use
To ensure durability, secure DIY hose guides firmly in the ground. Use concrete or screws for stability, especially in high-traffic areas. For softer surfaces, drive stakes deep to prevent shifting. Regularly inspect the guides and tighten any loose connections. Weather-resistant materials like rebar or durable plastics withstand outdoor conditions. Proper installation and maintenance ensure your hose guides remain effective and protect your garden for years to come.

Maintenance and Upkeep
Regularly clean and inspect your DIY hose guides to ensure proper function. Replace worn parts and tighten loose connections to maintain efficiency and longevity.
Cleaning and Inspecting Your Hose Guides
Regularly cleaning and inspecting your DIY hose guides ensures optimal performance. Use a soft brush to remove dirt and debris that may accumulate. Check for signs of wear, rust, or damage, especially around joints and connections. Replace any compromised parts immediately to prevent leaks or misalignment. Clean the hose itself periodically to maintain water flow and prevent clogging. This simple maintenance routine will extend the lifespan of your hose guides and keep your garden hydrated efficiently.
Repairing and Replacing Worn-Out Parts
Regularly inspect your DIY hose guides for wear and tear. If a part is damaged, replace it promptly to maintain functionality. For metal components, sand off rust and repaint. Plastic or wooden parts can be swapped with new ones. Tighten loose connections and ensure all moving parts operate smoothly. Replace any cracked or brittle elements to prevent further damage. This proactive approach keeps your hose guides reliable and extends their lifespan, ensuring your garden stays well-maintained and watered efficiently.

Troubleshooting Common Issues
Troubleshooting common issues with DIY hose guides involves addressing leaks, realigning mispositioned guides, and tightening loose connections. Regular inspections and quick fixes ensure optimal performance and longevity.
Addressing Leaks and Damage to the Hose
Inspect the hose regularly for cracks or punctures. For minor leaks, apply waterproof sealant or replace damaged sections. Tighten loose connections to prevent further issues. If the hose is kinked or bent, straighten it to restore water flow. Protect the hose from sharp objects or extreme temperatures to avoid future damage. Regular maintenance ensures your DIY hose guide system remains efficient and durable for years to come.
Fixing Misaligned or Loose Hose Guides
Check the alignment of your hose guides to ensure they are straight and secure. Tighten any loose screws or bolts that may have come undone. If the guides are misaligned, adjust their position to guide the hose properly. For added stability, consider anchoring them deeper into the ground or using anti-vibration pads. Regular inspections and adjustments will keep your DIY hose guides functioning smoothly and prevent potential damage to your garden or surrounding areas.
Creative Ideas for DIY Hose Guides
Transform your garden with unique hose guides using recycled materials, decorative elements, or colorful accents. Add lighting or functional features for a personalized and stylish solution.
Using Recycled Materials for Eco-Friendly Guides
Repurpose everyday items like old rebar, plastic bottles, or wooden stakes to create eco-friendly hose guides. Reusing materials reduces waste and adds a unique touch to your garden. For example, short pieces of rebar paired with small plastic orange golf balls offer both functionality and a decorative flair. This creative approach not only protects your plants but also supports sustainable gardening practices, making it a budget-friendly and environmentally conscious solution for your outdoor space.
Incorporating Lighting or Other Functional Features
Elevate your DIY hose guides by adding functional features like solar-powered lights or reflective markers for nighttime visibility. You can also integrate small planters or hooks for holding gardening tools. Additionally, consider embedding sensors to monitor water flow or soil moisture, making your hose guide a multi-functional garden asset. These creative additions enhance both the utility and aesthetic appeal of your garden, ensuring your space remains functional and visually pleasing year-round.
Safety Considerations
Ensure stability by securing guides firmly to prevent tripping hazards. Use weather-resistant materials to avoid corrosion and electrical risks, keeping your garden safe and functional for years.
Preventing Accidents While Using DIY Hose Guides
To ensure safety, secure DIY hose guides firmly to prevent tripping. Use smooth, rounded materials to avoid injuries and ensure guides are visible to avoid accidental collisions. Regularly inspect for wear and tear, replacing damaged parts promptly. Keep the area around the guides clear of debris and obstructions. Proper placement and maintenance will help prevent accidents, making your gardening experience safer and more enjoyable for everyone.
Ensuring Stability and Durability
For long-lasting DIY hose guides, use weather-resistant materials like durable plastics or rust-proof metals. Anchor them deeply into the ground for stability. Securely attach components to withstand regular use. Regular inspections and timely repairs prevent deterioration. Apply protective coatings to shield against harsh weather. Proper construction and maintenance ensure your guides remain functional and sturdy, providing years of reliable service in your garden.
Environmental Benefits
DIY hose guides promote eco-friendly practices by reducing water waste and using recycled materials. They help conserve resources and minimize environmental impact while keeping your garden tidy.
Eco-Friendly Materials and Practices
Using recycled materials for DIY hose guides reduces waste and supports sustainability. Reclaimed wood, metal scraps, or repurposed plastic items are excellent choices. Weather-resistant materials like bamboo or durable plastics minimize environmental impact. Eco-friendly paints or finishes ensure long-lasting protection without harming the environment. These practices not only conserve resources but also promote a greener approach to gardening, aligning with eco-conscious values and reducing carbon footprint effectively.
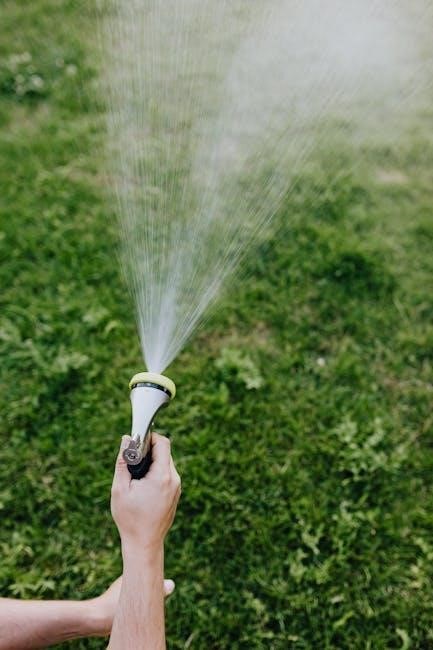
Reducing Water Waste with Proper Hose Guidance
Properly installed DIY hose guides ensure efficient watering by directing the hose precisely where needed. This targeted approach minimizes water spray on unwanted areas, reducing evaporation and runoff. By preventing kinking and tangling, guides maintain steady water flow, ensuring plants receive adequate hydration without excess. This mindful watering technique conserves water, lowers utility bills, and promotes healthier plant growth, making it an eco-friendly and practical solution for gardeners.
Cost-Effectiveness of DIY Projects
DIY hose guides offer significant savings compared to store-bought options. Using affordable materials like rebar or balusters, you can create durable guides at a fraction of the cost.
Comparing DIY Costs to Store-Bought Options
DIY hose guides are significantly more cost-effective than store-bought options. While store-bought guides can range from $20 to $50 or more, DIY versions often cost less than $10. Using materials like rebar, plastic balls, or repurposed items, you can create durable guides at a fraction of the price. This makes DIY projects a budget-friendly choice for gardeners, offering both short-term savings and long-term value through customization and durability.
Long-Term Savings and Value
DIY hose guides offer long-term savings by reducing replacement costs and extending hose lifespan. Durable materials like rebar and weather-resistant finishes ensure longevity, minimizing the need for frequent repairs. Customization allows for adaptability to changing garden needs, making DIY projects a valuable investment. While initial effort is required, the lasting functionality and aesthetic appeal provide significant long-term value compared to store-bought options.
User Testimonials and Success Stories
Gardeners praise DIY hose guides for their effectiveness in protecting plants and enhancing garden aesthetics. Many report long-term durability and satisfaction with their homemade solutions.
Real-Life Examples of DIY Hose Guide Success
Gardeners have shared inspiring stories of DIY hose guides transforming their outdoor spaces. One enthusiast used rebar and plastic golf balls to create durable, decorative guides that protect flowers. Another crafted stylish guides from pre-primed balusters and finials, achieving a professional look at a fraction of the cost. These creative solutions highlight the practicality and aesthetic appeal of homemade hose guides, making them a favorite among gardeners;
Feedback from DIY Enthusiasts and Gardeners
DIY enthusiasts and gardeners praise homemade hose guides for their functionality and style. Many appreciate how easy it is to customize materials like rebar or balusters to fit their garden’s aesthetic. Users highlight the cost-effectiveness and durability of these projects, with some noting how they’ve prevented plant damage and improved watering efficiency. The positive feedback underscores the satisfaction of creating practical, personalized solutions for garden care.
Advanced DIY Hose Guide Projects
Elevate your garden setup with multi-functional hose guides that combine organization and innovation. Integrate smart technology or lighting for enhanced functionality and aesthetic appeal in your outdoor space.
Creating Multi-Functional Hose Guide Systems
Design innovative multi-functional hose guides that serve beyond basic water management. Incorporate features like built-in plant markers, light holders, or even irrigation timers. These systems not only organize hoses but also enhance garden aesthetics. Use durable materials like metal or recycled plastic to ensure longevity. By merging practicality with creativity, you can create a cohesive and functional garden setup that meets multiple needs efficiently.
Incorporating Smart Technology for Automation
Elevate your DIY hose guide system with smart technology for seamless automation. Integrate sensors to detect moisture levels or timers for scheduled watering. Add voice-controlled adapters or smart valves to regulate water flow remotely. These innovations ensure efficient watering, reduce waste, and simplify garden maintenance. By merging traditional DIY methods with modern tech, you create a futuristic, eco-friendly solution that enhances convenience and precision for gardeners of all skill levels.
DIY hose guides are a must-have for gardeners, offering protection and style. They’re cost-effective, easy to make, and enhance your garden’s functionality and aesthetic appeal. Give it a try and enjoy the pride of a well-organized, thriving garden!
Final Thoughts on DIY Hose Guides
DIY hose guides are a perfect blend of creativity and functionality. They protect your plants, organize your garden, and add a personal touch. With simple materials and tools, anyone can create these practical solutions. The pride of crafting something yourself, combined with the satisfaction of a well-maintained garden, makes DIY hose guides a rewarding project. Whether you’re a seasoned gardener or a DIY newbie, give it a try—you’ll love the results!
Encouragement to Try the Project
Creating DIY hose guides is an easy and rewarding project that enhances your garden’s functionality and style. With simple materials and tools, anyone can craft these practical solutions. Not only will you protect your plants from damage, but you’ll also enjoy the satisfaction of creating something yourself. It’s a great way to personalize your garden and make watering easier. Give it a try—you’ll love the results and the sense of accomplishment!

Resources and Further Reading
Explore DIY blogs, home improvement stores, and online marketplaces for detailed tutorials and materials. Join gardening communities for tips and inspiration from experienced gardeners.
Recommended Tools and Materials Suppliers
For your DIY hose guide project, consider sourcing materials from trusted suppliers like Home Depot, Lowe’s, or Amazon. These retailers offer a wide range of durable and weather-resistant materials, such as rebar, plastic finials, and decorative stakes. Additionally, local hardware stores or online marketplaces like eBay often provide affordable and unique options. Always check reviews and product descriptions to ensure the materials meet your project’s needs and budget.
Additional DIY Guides and Tutorials
Explore detailed tutorials on YouTube, Pinterest, and Instructables for creative DIY hose guide ideas. Websites like The Spruce and This Old House offer step-by-step instructions. For unique designs, check out blogs featuring repurposed materials like rebar or PVC pipes. Many DIY enthusiasts share budget-friendly solutions, such as using curtain rod finials or deck screws. These resources provide inspiration and practical tips to enhance your project’s functionality and aesthetic appeal.